
The Process Of Installing Granite Countertops In Denver Homes
Granite countertops are gaining popularity among Denver residents for several reasons, including their ability to greatly increase a property’s value, their longevity, and their classic good looks. It is crucial to have a solid understanding of the installation procedure if you are contemplating installing granite countertops in your Denver home. As we progress through this post, we will guide you through the essential processes that are required to bring these breathtaking stone surfaces into your kitchen or bathroom.
1. Initial Consultation And Measurement
A preliminary meeting with a professional granite countertops Denver supplier is the first step in the process. During this discussion, you will talk about the colors you want to use, your budget, and your preferences about design. It is also the responsibility of the pros to obtain accurate measurements of the area on your countertop, which will ensure a perfect fit.
2. Selecting Your Granite Slab
One of the most exciting aspects of installing granite countertops is selecting the perfect slab. Denver offers a wide range of granite options, each with its unique patterns, colors, and veining. You can visit a showroom or view online galleries to browse through the available slabs. Once you’ve made your choice, the slab will be reserved for your project.
3. Templating And Fabrication
After the initial consultation and slab selection, the next step is templating. A template of your countertop area will be created using precise measurements taken earlier. This template serves as a blueprint for fabricating your granite countertop. Skilled technicians will cut the slab to the exact dimensions required for your space, taking into account sink and cooktop cutouts.
4. Edge Profile Selection
Granite countertops come with a lot of different edge profiles, ranging from the traditional bullnose to the more contemporary beveled edges. At this point in the process, you will choose the edge profile that serves as the most suitable complement to the overall design aesthetic. To produce a polished finish, the edge profile that has been selected will be meticulously molded into the granite slab.
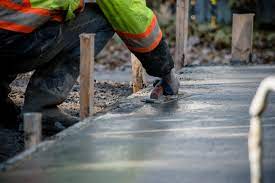
5. Installation Day
On installation day, the granite slabs are delivered to your Denver home. Professional installers will carefully transport the heavy stone and begin the installation process. First, they’ll ensure that the cabinets or supports are level and sturdy. Then, they’ll place the granite slabs in position, making sure they fit precisely. The sealant will be applied to the seams to create a seamless appearance.
6. Sealing And Polishing
Regular sealing is essential for the beauty and longevity of granite, a natural stone. After the initial installation, the installers will apply a high-quality sealant to the granite surface. This sealant helps prevent staining and ensures the stone remains resistant to moisture and bacteria. Following sealing, the countertop will be polished to enhance its shine and smoothness.
7. Final Inspection And Cleanup
During the last stage of the installation process, a comprehensive check of the countertop is performed to ensure that all of the components, including the sink and faucet fixtures, are in their proper positions. After the removal of any dirt or dust that may have been left behind, you will be left with a granite countertop that is spotless and ready to be used.
Conclusion
Installing granite in your Denver home requires a multi-step installation process. This involves planning and execution. Every stage of the process is important to ensure the highest level of craftsmanship and quality. Your kitchen or bathroom may become a showpiece with the help of experts who can advise you on the best granite slabs and edge profiles to use. Granite countertops add aesthetic value to Denver homes and also increase their long-term value. They are an investment that is worth it for Denver homeowners.